Redesign Update: Dining Room

The good news: So many of my house projects are close to being completed! The bad news: My house has been in flux and covered in projects for awhile because of it. Here's a small update on what the dining room looks like these days. 

Here are a couple pics of what it looked like before:


And here's what it looks like now:


 This dresser serves as both a sideboard and tons of additional storage for us. It's the same cheap IKEA dresser we have in the kitchen, but with a natural wood stain. That painting used to hang above the couch in the living room, but I love it over the radiator in this corner of the dining room. The desk seen in the pic above was actually a DIY project. We used IKEA kitchen cabinets for storage and put Grant's already existing table top (displaced when Grant got kicked out of his office to make room for Ruby).


We spent the weekend taking a trip to Home Depot to buy a ton of plants. Grant's dad made us this bench and I thought it would serve as the perfect plant stand. These are just cheap terra cotta plants that I painted to match the decor a little better. I love them.


Here's another little plant. Hopefully they'll work to filter our disgusting NYC air and keep it clean for our baby girl. 


Sneak peek at the kitchen redo!


While we sold the big red couch, we retained its thone-of-a-chair partner--after all, Homer needs something to lay on in every room.


 I spy a spider plant in the corner. Not the prettiest in the world, but according to the internet they're hard to kill!


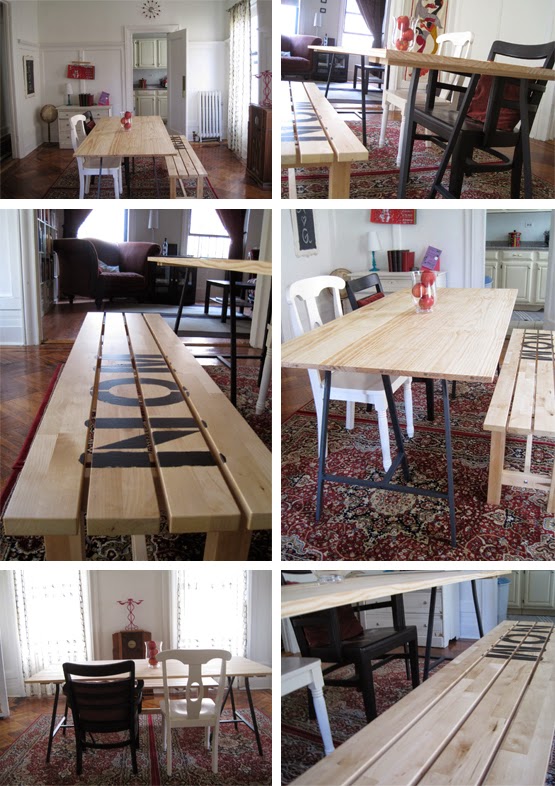
 I made the leap to paint our DIY $100 trestle table black and I'm loving how sleek it looks! I also love the new rug we got--black and white and aztec all over!


I DIY'd this painting last week and am sooooo happy with how it turned out. Post coming soon!


7 Things That Got Me Through This Week

I know I've been awful about posting. The pregnancy had me busy and then Charlie got very, very sick, but my hope is that I can post more regularly now! Enjoy the weekend, everyone!


Comfy Street Style on LA Cool & Chic/ Dining Room Dresser Makeover Inspo at House & Home Canada/ Pastel Assortment of Donuts on Tumblr/ Dining Room Rug Inspiration at Design Sponge/ Doubled-up Braid on Pinterest/ Gorgeous Bathtub Caddy on Scout Mob/ Geometric Art on Design Inspiration

DIY Advent Calendar


Christmas season is officially here! Every year it's so difficult for me to wait until after Thanksgiving to begin putting up decorations and start blasting holiday music. When December 1st hits, and I have free license to let my Christmas flag fly. This year we spent a day putting up the tree and the garland, sipping on hot cider and listening to cheery music. I also decided that I wanted to create a new tradition.

My love of Christmas has been present for as long as I can remember. I used to listen to my Nat King Cole Christmas tape until the ribbon wore out. I spent my birthday money one year on a mini Christmas tree to put in my room and decorated it every year. When I discovered advent calendars sometime in elementary school, it was a marvel. Mini presents every day leading up to Christmas? What could be better?! The ones we had as kids were always cheap cardboard boxes made to look like houses, with each "window" containing a Hershey's Kiss. Nowadays advent calendars are far more elaborate... and much more fun! A lot of them include holiday-related activities to participate in, as well as sweet treats.

So I made my own version of an advent calendar so that Grant (who had never even heard of the concept) can enjoy the time leading up to Christmas. I convert him from his Scrooge ways one of these days!


I used materials that I already had in the house (gift boxes, mini craft bags, markers, card stock, printer paper, fabric scraps, embroidery thread, ribbon and even nail polish!), so the whole project cost $0 and was really fun to complete. I think the fact that the supplies were so piecemeal worked to my advantage since I wanted the overall look to be eclectic. It also helped when it came time to make some of the days that called for fabric pockets (like the 5 above and 16 below). I didn't worry about anything looking professional and just matched up equal-sized fabric scraps, creating a hem by hand with embroidery thread. The 16 below is a personal favorite--it looks like a tomato since the pic got cropped, but it's actually a red ornament bulb. And since there weren't enough boxes and bags to get through the whole month (and sewing was far more time consuming than any of the other activities), some of the days are one-of-a-kind, like the "5 Gold Rings" above (there's an activity written on the "rings"), and the ribbon snowman below (whose accessories came care of my friend Jonathan who thought he needed a scarf.


Activity ideas abound on Pinterest, and some days Grant will be only getting candy--we do have television to watch at night, after all--so pulling off this project was pretty easy, and I think it'll make a great new holiday tradition that we can continue through the years! I mean, who wouldn't want to sip on hot cocoa with a candy cane stirrer? Nobody, that's who.


What holiday traditions do you participate in every year?


Wedding Ceremony Details


As you all know, Grant and I got married a few months ago. It was a fairly singular obsession for the months preceding the nuptials. Teaching in the city is an incredibly time-consuming job (wake up at 5, get to school at 7, leave school at 6, work for 3 more hours at home, repeat) so I didn't get much real time in the year before the wedding to really plan. My aesthetic vision for the wedding was A-Midsummer-Night's-Dream-meets-Old-Hollywood-Glam. I wanted it to feel like all these fabulous people at an incredible party fell asleep, and when they woke up the place had been a bit overtaken with lush florals and greenery. Most of that was realized in the reception decor, but I wanted to start by detailing the gorgeous ceremony.

The wedding (both ceremony and reception) were help at Bluestem Nursery and Vineyard in Crete, Nebraska. The rental was a large portion of our budget, but we got the run of the entire vineyard (including an adorable 1-bedroom cottage where we held our rehearsal dinner) for the whole weekend. This ensured that our vendors could get in early to execute some, admittedly, intricate requests.


The existing scenery was absolutely breathtaking. The stage where the ceremony took place had pillars and oversized pillared vases. Bluestem plants greenery that is beautifully overgrown at the end of the summer, and was a lovely complement to the gauzy fabric that Blooms & Bouquets draped around the columns. I had them tie back the drapery with a garland, which was also draped on the backs of the chairs. Topping off the garland were amazing floral wreaths filled with vintage garden flowers such as hydrangeas, roses and peonies. Then we lined the aisles with a smattering of flower petals. The overall effect was striking and romantic.


My bouquet was a combination of the same flowers, as well as hanging greenery. I wanted it to be grander than it turned out to be, but I guess "oversized" isn't enough of a descriptor. My number one recommendation for particular brides like myself when planning your wedding is to be so obnoxiously Type-A that there is no room for misinterpretation. Like, give them actual measurements. Feel like telling your florist that a bouquet must be 18-inches from tip to toe is too Bridezilla? Well, it's a lot less Bridezilla than getting angry the day-of when it's too late to change anything. Plus, your vendors are being well-compensated for their work. It's their job to give you precisely what you want. They were still really pretty bouquets though.


The entrance to the ceremony area included a number of items for guests to enjoy. An August wedding in Nebraska can bring with it insufferable heat. Luckily it wasn't that bad on our big day, but we provided our guests with cold refreshments to take the edge off. Guests were given the option to be bussed in on coordinated charter buses and bussed back at the end of the night. This gave everyone the option of a safe ride home after an open bar, and also ensured that they wouldn't be waiting in the sun for too long before the ceremony started. We also provided purple ribbons for guests to wear in support of equal marriage rights. A lot of our guests are still not able to get married in our home state and I can't wait until the day when they can have their own wedding! In lieu of programs, I designed a chalboard-esque wedding party sign, had it printed, and affixed it to an oversized frame we rented from Nostalgia Rentals (they also provided the table, other frames and containers). Patricia Catering did our amazing reception food, as well as the pre-ceremony beverages.


Guests could also cool themselves down with these custom church fans we had made. The illustration is AMAZING, and was actually done by a good friend of mine (and bridesmaid!) Kristin for our invites. We sent her a picture of Bluestem since we knew the wedding was being held there, and she drew us on our wedding day. The illustration is just darling and it's definitely one of my favorite things from the wedding day! (Tip #2: If you have talented friends... use them! You can pay them back by throwing the best party ever.) These fans were a feature the whole night and were also a fab prop when the dance floor require a little pantomiming.


Of course, the most gorgeous part of the ceremony was the group of people we had around us. The men dressed in classic tuxes (Grant had his custom-made from Kleinfelds...ooh la la) and I let the ladies choose their own dresses. I just gave them a few guidelines: 1. Full-length gowns 2. Neutral color palette 3. Vintage/classic cuts 4. Sparkle encouraged. I could never have imagined that the combo would look this amazing together! My bridesmaids live all over the country (no two live in the same city and NONE of them live in NYC) so I was blown away how well the looks blended. There were even mirrored cuts (2 strapless, 2 V-necks, 3 boat necks) but all of the different fabrics, gatherings and subtle patterns meant that each look was unique. By no design of mine, their dresses even managed to create a hue spectrum when they were all lined up for the ceremony. Ugh, I can't get over how gorgeous these ladies are.


Grant and I had a fairly non-traditional ceremony. We asked his uncle Gifford to officiate, didn't have a ring exchange (ask to see my tattoo sometime!), had just one reading, and asked our fathers to participate in a Celtic hand fasting ceremony. Writing your own ceremony and vows is tough, but I really do feel like our ceremony was personal and touching... and was a perfect reflection of our love as a couple. If you're interested, here's our short ceremony.


Officiant’s Welcome
Gifford: Welcome friends, family, and honored guests.  Before we begin today, Grant and Helen would like to ask anyone who is able and willing to take out their smart phone or camera and record video of this short ceremony. The couple would like to remember this moment from each of your perspectives.

Officiant’s Address
Gifford: All of you are present today because you, in one way or another, have been part of Grant and Helen’s lives. Today we witness a marriage that has its roots in a 7th grade classroom, when a couple of 12-year-olds showed up to learn about Biology.

In marriage, two people turn to one another in search of a greater fulfillment than either can achieve alone. Marriage is a bold step, taken together, into an unknown future. It is risking who we are for the sake of who we can be. Marriage is a bond to be entered into only after considerable thought and reflection. Nearly 20 years after that fortuitous meeting in a classroom, Grant and Helen are ready to take the next step, to make this commitment. Today, they demonstrate their devotion to one another by dedicating themselves to a life together.

Today, their lives, which began on separate paths, will be joined as one.
Reading:
Gifford: Grant and Helen have chosen a single reading. It comes from Antoine de Saint Exupery’s The Little Prince, a text that Helen teaches to her students, and which exemplifies the nature of love and human relationships. Ben Tibbels, a friend of the bride will perform the reading.
Ben: <reads excerpt from Exupery's The Little Prince
Hand-fasting:

Gifford: In lieu of rings, Helen and Grant have chosen to include in their ceremony the traditional Celtic custom of hand fasting. Grant’s father, Barry, and Helen’s father, Randy, will read the blessing. Gentlemen, come join us up here.

·      Barry and Randy come to the microphone
·      Gifford wraps ribbons around Grant and Helen’s hands as Barry/Randy read

Barry: These are the hands that will work alongside yours, as together you build your first home, plant your first garden, and walk forward hand-in-hand into your future. These are the hands that will passionately love you and cherish you, the only ones with the ability to comfort you like no one else can.

Randy: These are the hands that will tenderly hold your first child, the hands that hold your family together as one. And lastly, these are the hands that, even when wrinkled and aged, will still be reaching for yours as they hold you here, now, promising you they will never, ever let you go.

Gifford: Bless these hands that you see before you this day. May they always reach out with love, gentleness, and respect. If you follow these words and heed this sacred binding, your hands will heal, protect, shelter, and guide. Now, you may remove the cords, but remember the knot as a lasting symbol of your binding and commitment.
[Barry and Randy sit]
Vows:
Gifford: Grant and Helen have prepared vows they would like to read to one another today. Grant...
Grant reads prepared vows
Gifford: Helen…
Helen reads prepared vows
Pronouncement:
Gifford: No one but you can declare yourselves married. You have begun it here today in speaking your vows before your family and friends and you will do it again in the days and years to come, standing by each other, sharing all the sweet and the bitter of life. Each tender act, each loving word, will be the declaration of what was made here today.
In the honesty and sincerity of what you have said and done here today,
It is my honor and delight to declare you
To be husband and wife
You may seal your vows with a kiss
[Grant and Helen kiss]
I proudly introduce to you, for the first time, Mr. and Mrs. Grant Rogers

DIY Mani: Breast Cancer Awareness


Wet n' Wild, Wild Shine in Tickled Pink/ Art Deco, Art Deco Nail Lacquer in White/ Diamond Shield, Crystal Clear Nail Laminate

October is Breast Cancer Awareness Month. As the most prominent cancer in women it seems that we've all known someone affected by it. In fact, 1 in 8 women will experience invasive breast cancer in her lifetime. To remind myself (and the world) that I'm a breast cancer ally, I panted my nails a sweet shade of pink and painted on a ribbon.

To find out more about how to protect yourself and what you can do to help the fight, visit the National Breast Cancer Foundation.

DIY Costume: The Hamburglar

Today is the first in a series of Halloween costume how-tos. I love Halloween but I hate those costumes you buy out of a bag at Party City. Sexy kitty, sexy Dorothy, sexy Elmo, sexy lamp post. (Only one of those is not a real thing.) Plus, those things will cost you around $70 and you'll never be able to use it again. Trust me, the one time I went as slutty anything for Halloween I thought I'd do it with a bang and chose Playboy Bunny. Anytime I clean out my underwear drawer I find my bunny costume, which I kept in hopes that I would use it again in order to excuse the cost. Sadly, I don't think my thighs will ever allow for that again.

But not to fret dear readers, putting together a costume on your own can produce a result that's just as cute--and 100 times more fun! They cost a whole lot less and you'll probably get use out of at least a couple of the pieces again. Win-win-win! This week I'm bringing you how to put together a costume for The Hamburglar, the little gingy from McDonalds Land whose priorities are about the same as mine. 
Striped Dress, Forever 21/ Hamburger Tie, Ebay/ Mask, Amazon/ Gloves, Amazon/ Hat, e4Hats

The whole thing comes in at just over $50, which is pretty reasonable considering you'd definitely rock that hat next summer at the beach and the dress could be repurposed for so many looks.

7 Things That Got me Through the Week


An elegant take on Halloween via Daniella Marie/ Baked Sweet Potato Chips from Sweet Pea's Kitchen/ Bowtie Manicure at Makeup.com/ Denim-on-denim shoe inspiration on They All Hate Us/ Metal Chair Makeover via Whipperberry/ DIY Hair Accessory Inspo at Ban.do/ Oatmeal Recipes on Babble

DIY: Faux Watercolor Art


After painting our accent wall black and choosing so many black and white accessories, the room was begging for color. I brought some into the bed through floral throw pillows, but those walls were still blank as ever. I needed art and I needed color... and I didn't have much money. I couldn't afford any of the art that's on my wish list, so I decided I'd make some myself! Now, I'm no artist but I figured copycat-ing some simple modern art wouldn't be that tough.

I hunted around Pinterest for some inspiration and came upon this watercolor print that I loved:


I found a few canvases on Amazon, used other materials I had around the house and got to work. I'm super happy with how they turned out!


And it was so easy! Check it out!


Wait, you want to actually know how to do it yourself? OK, fine here's the official tutorial:

What you'll need:


  • Canvas(es) (Any size really, I nabbed two 18x24 canvases for under $20)
  • Paint brushes (Any flat bristles will work)
  • Acryllic Paint (I had a bunch of acrylics on-hand)


I wanted the colors to reflect the bright ones found in the throw pillows, so I selected contrasting reds/pinks and blue. I tempered that with a third primary color, a dark charcoal. If you don't want the painting to be too 90s bright-on-bright, choose two opposing primaries and one main neutral to balance them out. Then pick one or two different shades of each of the primary hues. Then throw in a couple other neutrals.


 The best part about this project is that it's pretty fool-proof. Squirt drops of each of your primary colors and a few neutrals. After you've dropped your colors, spread them with your brush up and down into broad strokes. You don't want to spread the paint that thin--the paint needs to stay wet enough that it can be blended with paint in the future. I made my drops pretty large, so they produced correspondingly large streak. If you want smaller streak, just make your drops smaller.


Next, drop more dots. This time you'll mostly want to use neutrals and less in-your-face hues, but if you see that your painting is missing colors that you want to be present (like the bright pink on the left), drop those too. I could see that my original drops took up a lot of the canvas, so I made these drops small. You can play this by ear. Next, blend with these with the existing strokes.


Finally, fill in any gaps with colors of your choosing. Personally I wanted more color, so I dropped more primary tones, but if you see that you've already made your painting brighter than you wanted, go for neutrals. All-in-all the project too around 20 minutes to complete and was well worth the time.