DIY Abstract Art

Hello! Long time, no blog! My apologies for not updating more often. The end of my pregnancy was tough and now I have a wee babe, so I'll try to write as much as I can, but posts may be shorter and further apart.

Way back when I redid the living room, I wanted something to hang above the storage dresser and between the awesome new ebony lamps I got. None of my currently owned art fit the bill so I decided to make something myself. I wanted it to be bold and modern--and easy enough to replicate that even an artistically challenged person such as myself could replicate it. I was thinking something along these lines:


Bold, modern... easy enough to replicate, right? At the time that I bought the canvas (for cheap off of Amazon) and planned out what I would spend the afternoon making, Grant and I were leaning toward the first option. I liked that it boldly disallowed for negative space and that the gold border added an elegant touch. Then, while watching American Dreambuilders (check it out if you haven't already), I spotted this guy in one of the completed rooms. 


First of all, I like that it brought some color in--something that I'm fearful of doing far too often. It seemed a bit more artistic and less random than the others, but still simple enough to replicate. So I set to work on my canvas with acrylic paints and brushes that I already owned. Honestly, it was really simple. I used a foam craft brush to disperse large areas of paint (moving from yellow over to black), and a smaller bristle brush to create was Grant says "looks like torn paper." The key is not to get impatient and to let the paint on each color dry completely before moving on to the next. Beyond that, it was an easy-peasy project (costing less than $20) and I'm so happy with how it turned out. Check it out!




Redesign Update: Dining Room

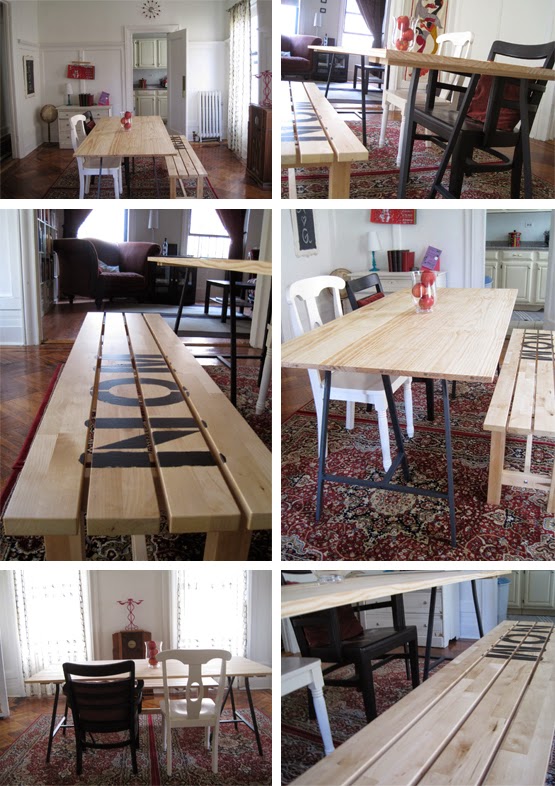
The good news: So many of my house projects are close to being completed! The bad news: My house has been in flux and covered in projects for awhile because of it. Here's a small update on what the dining room looks like these days. 

Here are a couple pics of what it looked like before:


And here's what it looks like now:


 This dresser serves as both a sideboard and tons of additional storage for us. It's the same cheap IKEA dresser we have in the kitchen, but with a natural wood stain. That painting used to hang above the couch in the living room, but I love it over the radiator in this corner of the dining room. The desk seen in the pic above was actually a DIY project. We used IKEA kitchen cabinets for storage and put Grant's already existing table top (displaced when Grant got kicked out of his office to make room for Ruby).


We spent the weekend taking a trip to Home Depot to buy a ton of plants. Grant's dad made us this bench and I thought it would serve as the perfect plant stand. These are just cheap terra cotta plants that I painted to match the decor a little better. I love them.


Here's another little plant. Hopefully they'll work to filter our disgusting NYC air and keep it clean for our baby girl. 


Sneak peek at the kitchen redo!


While we sold the big red couch, we retained its thone-of-a-chair partner--after all, Homer needs something to lay on in every room.


 I spy a spider plant in the corner. Not the prettiest in the world, but according to the internet they're hard to kill!


 I made the leap to paint our DIY $100 trestle table black and I'm loving how sleek it looks! I also love the new rug we got--black and white and aztec all over!


I DIY'd this painting last week and am sooooo happy with how it turned out. Post coming soon!


Nursery Mood Board

I may look like a bowling ball, but the good news is... we're halfway there! Twenty weeks in and we're starting to get prepped for the impending arrival of our little girl. Yep! Little baby girl! Grant was convinced that it was a boy because "Rogers don't make girls," but I knew it was a girl from the beginning. Even though I knew in my heart it was a girl, I had no idea what I would do with a girl's nursery. After far too much internet browsing I've planned out a room that is far more feminine than I had ever imagined. A lot of the details are sophisticated and elegant, but hey, even babies like gold sparkly things right? 

We're keeping the fold-down sleeper couch in there (it's off-white) for late nights and mom/dad hangouts. Above that will be a couple very long floating shelves for more storage. I'm also getting some custom oil paintings made inspired by this gem of badass historical women (Catherine the Great and Elizabeth I), but with the dog's heads on them. Don't worry, I'm keeping the wigs and crowns. And if that doesn't sound amazing to you, you are not my kind of people. 

There are also a couple DIY projects involved. First, I'll be turning an affordable IKEA dresser into something much fancier with the help of a few outside products. Then I'll be adding my favorite element (this great toile from Flavor Paper dedicated to Brooklyn--complete with Biggie Smalls and Coney Island Cyclone) by creating a large framed pinboard and papering the back of a shelving unit. One of the walls will be a chalkboard wall (a Grant request), with the top half of the wall housing backless frames that will highlight kid art. 

1. Dresser, IKEA + O'verlays + Handles 2. Chandelier, Urban Outfitters 3. "Dream Big Little Girl", Etsy 4. Personalized Crest Art, Etsy 5. NYC Art, Etsy 6. Rug, IKEA 7. Sheepskin Throw, IKEA 8. Banner, Land of Nod 9. Shelf, IKEA 10. Wallpaper, Flavor Paper 11. Flowers and Vase, Target 12. Crib, Target 13. Side Table, Target 14. Crib Sheet, Land of Nod 15. Changing Pad, Target 16. Glider, Target; Paint: